Understanding Vinyl Plank Flooring
What is Vinyl Plank Flooring?
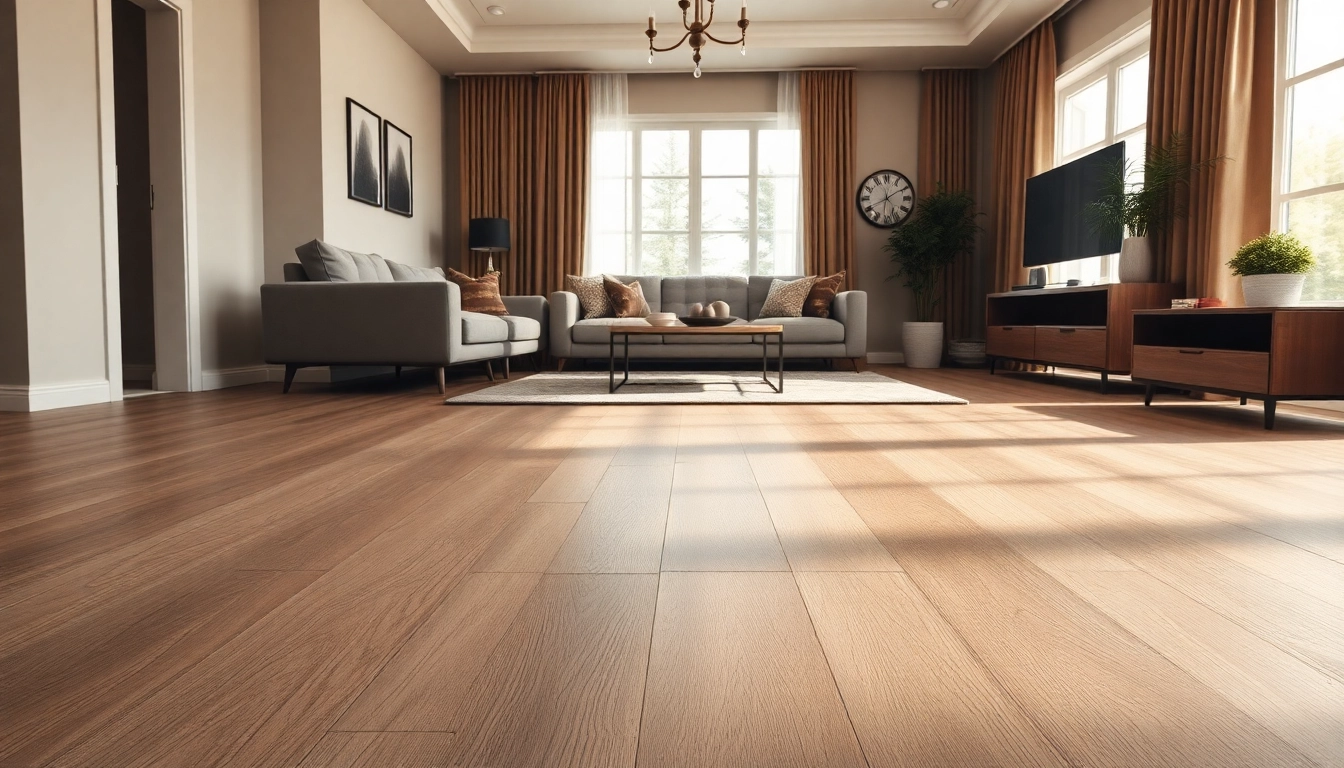
Vinyl plank flooring is a type of resilient flooring designed to mimic the appearance of natural materials such as wood and stone. It is composed of multiple layers that include a waterproof core, a design layer with printed visuals, and a protective wear layer on top. This innovative flooring solution has gained its popularity for both residential and commercial spaces due to its aesthetic appeal, durability, and ease of maintenance. The vinyl plank flooring market has expanded significantly, offering a variety of styles, colors, and textures to match any interior design scheme.
Types of Vinyl Plank Flooring
There are several types of vinyl plank flooring, categorized primarily based on installation methods and product construction:
- Glue-Down Vinyl Plank Flooring: This type involves using adhesive to secure the planks to the subfloor, making it ideal for high-traffic areas. It provides a secure installation and typically works well in commercial settings.
- Click-Lock Vinyl Plank Flooring: Featuring an interlocking mechanism, this installation type allows for a floating floor, making it less labor-intensive. It’s suitable for DIY enthusiasts and can be installed over existing floors.
- Loose Lay Vinyl Plank Flooring: This is designed to lay flat without adhesive, allowing for quick installations and easier replacements. It is often used in temporary or rental situations.
- Rigid Core Vinyl Plank Flooring: This product has a thick core that adds stability and minimizes noise. It’s perfect for environments where comfort and sound absorption are a priority.
Benefits of Choosing Vinyl Plank Flooring
Vinyl plank flooring presents numerous advantages, making it a smart choice for homeowners and businesses alike:
- Durability: Vinyl plank flooring is resistant to scratches, dents, and stains. Its tough wear layer protects the visuals from fading, making it suitable for high-traffic areas.
- Waterproof: Many vinyl planks are entirely waterproof, which helps prevent damage from spills and moisture. This feature makes it an excellent choice for kitchens, bathrooms, and basements.
- Easy Maintenance: Cleaning vinyl plank flooring is a breeze; regular sweeping and occasional mopping are sufficient to keep it looking new. There’s no need for waxing or polishing.
- Aesthetic Versatility: The wide range of designs available allows homeowners to find styles that suit their decor, from rustic wood grains to sleek stone looks.
- Comfort and Warmth: Vinyl flooring feels warmer and provides better underfoot comfort compared to tile or hardwood, enhancing the overall comfort of your space.
Installation Process of Vinyl Plank Flooring
Preparing Your Subfloor
Before installing vinyl plank flooring, proper preparation of the subfloor is critical for achieving a flawless finish. Here’s how to prepare your subfloor:
- Clean the Area: Remove any debris, dust, or old flooring materials from the installation space. This ensures that the new floor adheres properly and avoids imperfections.
- Level the Floor: Check for any high or low spots using a leveling tool. A flat surface is essential for a smooth installation, so fill in low areas with an appropriate leveling compound.
- Moisture Check: Test the subfloor for moisture, particularly in basements. If moisture levels are high, seal the subfloor to prevent damage to the vinyl.
- Underlayment Installation: Depending on the type of vinyl plank flooring, an underlayment may be necessary to reduce noise and provide additional cushioning.
Step-by-Step Installation Guide
Once your subfloor is ready, follow this step-by-step installation guide:
- Measure the Space: Calculate the square footage of the area where you will install the flooring. Purchase enough vinyl planks, accounting for waste.
- Acclimate the Planks: Let the planks sit in the installation area for at least 48 hours to adjust to the room’s temperature and humidity.
- Start Laying the Planks: If using glue-down vinyl, apply adhesive according to the manufacturer’s instructions and lay out the planks. For click-lock systems, begin in a corner and work your way out.
- Cut as Necessary: Use a utility knife or saw to cut planks to fit around corners or edges of the room. Ensure you leave expansion gaps near walls and other fixtures.
- Finish Installation: Once all planks are laid, go around the perimeter and install any transition strips or trim pieces for a seamless look.
Common Installation Mistakes to Avoid
Even seasoned DIYers can make mistakes during installation. Here’s a list of common pitfalls and how to avoid them:
- Ignoring Subfloor Preparation: Skipping surface leveling or cleaning can lead to visible imperfections. Always ensure your subfloor is clean, dry, and smooth.
- Mismatched Plank Direction: Plan the layout beforehand; running planks in different directions can disrupt the floor’s visual appeal.
- Improperly Not Leaving Gaps: Failing to leave an expansion gap can cause the vinyl to buckle or warp over time due to temperature changes.
- Neglecting Acclimation: Installing planks without allowing them to acclimate may result in warping or gaps later. Always follow acclimation guidelines.
- Rushing the Process: Take your time, especially during cutting and fitting. A rushed job can lead to mistakes that may require redoing the work.
Maintenance Tips for Vinyl Plank Flooring
Daily Cleaning and Care Tips
Maintaining your vinyl plank flooring daily can significantly increase its lifespan and appearance. Follow these simple care tips:
- Regular Sweeping or Vacuuming: Remove dust and debris with a broom, or use a vacuum without a beater bar to protect the surface.
- Spot Cleaning Spills: Wipe up spills immediately with a damp cloth or mop to prevent stains and slippery surfaces.
- Use Floor Mats: Place mats at entry points to reduce dirt and moisture tracked onto the flooring, minimizing wear.
- Avoid Harsh Chemicals: Use manufacturer-recommended cleaners specifically designed for vinyl flooring to avoid damaging the surface.
Long-Term Care Procedures
For long-lasting beauty and durability, more comprehensive care is necessary. Here are some long-term maintenance procedures:
- Deep Cleaning: Perform a deep clean every 1-3 months by using a damp mop with a vinyl floor cleaner.
- Recoat When Necessary: For heavily used areas, a refinishing coat may be required. Apply the reconstructor following the manufacturer’s guidelines.
- Inspect Regularly: Check the flooring periodically for any signs of wear or damage and address issues promptly to prevent further damage.
- Protect from Sunlight: Use curtains or UV window films to minimize exposure that may cause fading over time.
How to Remove Stains from Vinyl Plank Flooring
Stains can occur over time. Here are some effective methods to treat various types:
- Food and Beverage Stains: Blot spills with a cloth and use a mixture of vinegar and water to clean it up.
- Ink Stains: Dab with rubbing alcohol on a soft cloth, then clean the area with soap and water afterward.
- Scuff Marks: Remove scuffs by gently rubbing the area with a tennis ball or an eraser, following up with a light clean.
- Pet Stains: Clean with an enzymatic cleaner specifically made for floors, ensuring the area is rinsed thoroughly afterward.
Design Ideas Using Vinyl Plank Flooring
Color Schemes that Pair Well
The versatility of vinyl plank flooring allows it to complement a wide range of color schemes. Consider these pairings:
- Neutral Shades: Light and earthy tones like taupe or beige provide a subtle backdrop for bright accent colors, making spaces feel inviting.
- Bold Contrasts: Darker planks juxtaposed against light walls create a modern and dramatic aesthetic.
- Monochromatic Palettes: Using various shades of the same color can create depth and interest while maintaining a cohesive look.
- Natural Wood Tones: Rustic wood-style vinyl planks can enhance both contemporary and traditional décor by adding warmth and texture.
Styling Tips for Different Rooms
When styling with vinyl plank flooring, consider the unique requirements and designs of each room:
- Living Room: Choose planks with a wood look to create a warm and inviting environment, enhancing the space with area rugs for comfort.
- Kitchen: Opt for a light, waterproof vinyl that mimics stone for a sleek, clean surface that’s durable under heavy use.
- Bedrooms: Soft, warm tones can help create a relaxing retreat. Pair with plush carpets or textiles where needed.
- Bathrooms: Select a high-quality, waterproof option in a stylish pattern for a streamlined look that can withstand moisture.
Combining Vinyl Plank with Other Flooring Types
Combining vinyl plank flooring with other materials can create unique transitions and visual interest across spaces:
- Tile: Use vinyl in adjacent areas like hallways leading to a tiled bathroom. Transition strips will help blend the two materials seamlessly.
- Carpet: Transition to carpeted areas in bedrooms, providing a comfortable area for warmth underfoot.
- Hardwood: In open spaces, vinyl can offer a modern alternative to traditional hardwood, providing design continuity with flooring texture differences.
Frequently Asked Questions about Vinyl Plank Flooring
Is vinyl plank flooring durable?
Yes! Vinyl plank flooring is highly durable due to its resistance to scratches, dents, and stains. With proper maintenance, it can last many years.
Can vinyl plank flooring be installed over existing flooring?
Absolutely, vinyl plank flooring can generally be installed over existing floors, provided the surface is level and securely attached. Avoid thick carpets or uneven surfaces.
What is the lifespan of vinyl plank flooring?
Typically, vinyl plank flooring can last between 10 to 30 years, depending on quality, installation, and maintenance. Opt for high-quality products for increased longevity.
Is vinyl plank flooring waterproof?
Many vinyl plank flooring options are waterproof, making them an excellent choice for areas prone to moisture, such as kitchens and bathrooms.
How to repair damaged vinyl plank flooring?
For minor scratches, use a repair kit designed for vinyl flooring. For larger damages, you can replace individual planks by extracting them and installing new ones.